2007 We Bought a Greenhouse!!!
And now we get to build it!!!
***Requisite Disclaimer:*** I am posting this info to show how we assembled my greenhouse - in the hopes that someone else might find it helpful. We are not Construction Professionals (which *should* be fairly obvious!), so this is not intended to be taken as "Gospel!" Use whatever info you find useful, but if you're in doubt, PLEASE consult a professional! And check your local building codes, etc. etc. before proceeding. I am not responsible for any errors, damage or injury that may occur as a result of following our "Totally Unprofessional Advice" (Remember, we were being supervised by a Dachshund!:-)
Whew! Glad we got THAT out of the way! Page Added 06/04/07... And [kinda] completed on 08/18/07! (Go to "Greenhouse Saga Continues" page (link above) to read more!) Hubbie bought me a Greenhouse for my B-Day. And I plan to post the destruction - errr - construction pictures and explanations here. The greenhouse is the 6x8 model from Harbor Freight Tools. As greenhouses go, it's *very* reasonably priced. But it's also going to require some "improvements" to make it more durable and usable. Hint (if you're thinking of buying one): check out the "Greenhouse and Garden Structures" forum on www.gardenweb.com. If you search on 'HFGH' (Harbor Freight Greenhouse), you'll get TONS of hits and TONS of useful information. AWESOME people there!!! If you're thinking of buying one - here are a couple of links (from Gardenweb) that I found very useful Harbor Freight Greenhouse Assembly Conifer's pictorial instructions are EXCELLENT. Although the greenhouse design has changed, a bit, since that posting. It also seems like the supplied instructions have improved "somewhat" - but this is still an invaluable post (and I won't even pretend to presume that the photos I'll be posting will be half as good!) Another good one: My HFGH - insulated north wall with pictures I copied this poster's idea for raising the height of the GH. The insulation isn't much of a concern in my zone (I'm gonna have more "challenges" with keeping it cool during sunny weather!). Anyway, this post also includes terrific pictures and I found it very helpful! Anyway, as I said, this site is a Work In Progress... Stay tuned for updates!
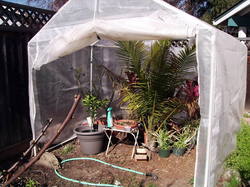
This is the old "Plastic Tent" greenhouse that did an "OK" job of overwintering my marginal plants. It was cheap, very difficult to maintain temps (temp maintenance was "me" going outside to open the door and window - most of the time!), always drippy-wet inside, and prone to bug infestations. Oh, and it started to disintegrate last year!!!
|
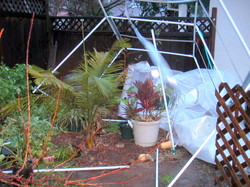
And this is what happens to a cheap Plastic-Tent greenhouse in a major windstorm!!! (12/31/06)
|
|
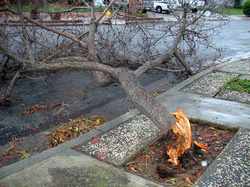
To be fair, this particular windstorm did *this* to a neighbor's tree (a tree that, incidentally, I usually park under!!!)
|
"Stock Photo" of 6x8 greenhouse from Harbor Freight Tools. IMHO it seems a little "short" so I'm modifying the design (described later)
|

Step#1 - Make sure you have all of your instructional materials available! (Tools are important, too - But I forgot to snap a picture!!!)
|
|
Step #2 - Inventory all the pieces! (I haven't really finished that, yet - but I understand it's a VERY important step!) Panels are all present and accounted for (and stored elsewhere in the yard)BTW - When all was said and done, we did receive ALL pieces (only short one bolt - which I was able to substitute) for the GH. The self-opener (for one of the windows) *was*missing a couple of screws, however. Definitely check your 'Parts Inventory' as soon as you receive your 'stuff!!!'
|
|

Step #3 - Identify and prepare the site. Okay, I've identified it - but I'm nowhere near prepared! (I need to transplant my veggie garden - waaahhh!!)
|
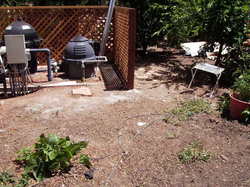
Another view of site. It's in the far-back corner, behind the pool equipment and A./C unit. The site is "mostly level" and does have access to water and electricity (very useful - I don't want to drag extension cords/jugs of water in the midde of winter!).
|
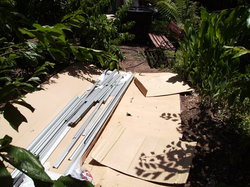
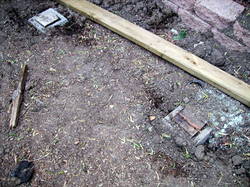
 Step#4 - Start your foundation. I've opted for 2x6 Pressure Treated lumber which will be affixed to sunken concrete anchors. The PT lumber will rest on the ground (and probably be partially buried in spots)
 |
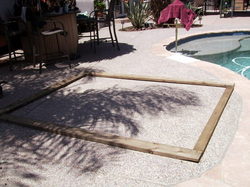
 Step #4A - Still working on the foundation. I chose to raise the height of the GH by using 2x12 redwood. Here we're doing a "dry-run" of piecing it together on the patio (which is pretty level). Annie is "supervising!"
|
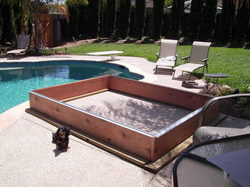
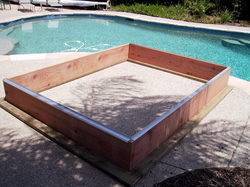 Another view of the "dry run" with the aluminum base pieces laid on top. The instructions indicate that the overall dimensions s/b 75" x 97.5" - They're actually a "hair" off (s/b more like 97.75" long [Updated 08/02/07: Guess again! See below: I think they need to be longer, still!]) - so it's a good idea to do the "dry run" w/the base pieces [and ALL FOUR "studs"] before you cut the lumber.
|
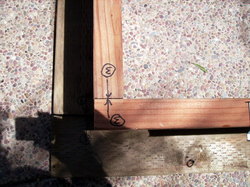 Rog wanted to mark the corners to show where they're supposed to match up (Good idea since we'll be doing the actual assembly back in the garden)
|
 Another shot of alignment markings - this time I've laid the aluminum base pieces on top (and I also placed a corner stud - not shown - to confirm the alignment).
* * * * * * * * * * * * * Update 06/09/07: Slow-going this week (I'll admit, I've been lazy! I just tackle a little bit, every night). I did clear the veggie garden though (with limited success), and I cleared the concrete piers that were piled along the back fence (those suckers are HEAVY!). And now I'm starting to dig trenches for the PT base lumber...
|
We burned a chunk of the weekend getting this far (and we haven't even started the greenhouse yet!). When we get ready to set-it-up in the garden, I'll add "L" angle brackets to the wood foundation (both the PT lumber and Redwood). Should help w/stability. Right now, I've got to clear the veggie garden; level the base where the lumber will rest; sink the concrete anchors; and start reassembling the foundation back there. And I want to do most of the assembly myself - tackling it a couple of hours a night (early evening when it's not so bloody hot out there!!!). This is supposed to be a one-day project (and many have posted that it can be done), but I've got all summer and figure I want to take my time (rather than stress out over it)! Anyway, that's it so far! I'll update it as we make more progress!
|
 Site wasn't as level as I thought, so there's plenty of digging ahead. Toward the "front" the soil is *much* improved and not too terribly difficult to dig. Still, I'm - umm - no longer in my 30's. With "maturity" comes "patience" 'cuz the body just don't wanna do what it used to do - at least not as "quickly" (or without "consequence!")!
|
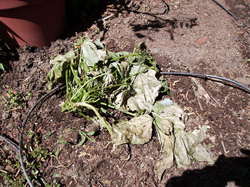 Bush Beans don't like to be transplanted :-(
|
 06/28/07: We're progressing VERY Slowly on the GH, but we did manage to sink some concrete anchors this last weekend...
|
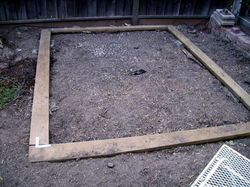
 Pre-assembly shot of the "base" base (PT 4x6) - And Annie's still supervising!!!
Next steps will be to fill in the gaps underneath the PT lumber, then add the 2x12 redwood "riser" base. That part'll have to be be perfectly square/level (I've been a bit "sloppy" up 'til now!). I've already started priming the RW pieces in anticipation of the next step... Stay Tuned for updates!!!
|
|
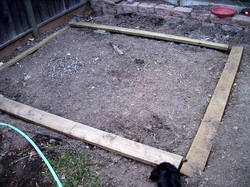
 I *thought* the site was level!
Turns out I had to dig a trench for the front, and I'm gonna have to transfer dirt/sand/gravel/whatever to raise the back! But you can see some of the 'L' brackets we installed on the PT lumber (BTW, the lumber ended up 'warping' before we completed construction - something you might want to be aware of / and may need to compensate for...) * * * * * * * * * * * * * 07/01/07 - Okay, it's been almost a month since my B-Day! So I'm slow!!! Actually, it's been extremely hot during the day, shade is damn-near non-existent, and it's difficult to get much done after work (Excuses, excuses!!!). Anyway, progress is happening, just very slowly!!! This weekend, I started to paint the 2x12 baseboards so we'll assemble them (hopefully) this week. *Then* I'll start assembling the actual greenhouse, okay?!!
|
 Painting the redwood 2x12's
|
 07/28/07 - Okay, so we're hella slow! We *finally* got around to assembling the beast this weekend! First off: MEGA Thanks to Conifers for posting his (her?) pictorial instructions on Gardenweb (The pics were an absolute GODSEND!!!)
HF's instructions really do suck!!! The dimensions (for the foundation boards) provided in their instructions are WRONG! Suggestion: Do a dry run w/the aluminum base plates + ALL FOUR corner studs BEFORE you finalize assembly of/start cutting the wooden base!! Otherwise , you'll hafta deal with this! ---> We did do the "dry run" but I was somehow oblivious to the fact that the aluminum base pieces, when laid out properly, extended beyond the wood base pieces (Oooops!). Another Hint - for those who want to complete most of the assembly "Solo" (and that would describe ME!), this portion of assembly really is a Two-Person Job: Securing the aluminum base pieces to the wooden base; adding the four corner studs; and the first three "upper" (horizontal) supports is almost-definitely a two-person job. You'll want to assemble the base+studs+upper-frame pieces before you secure the (aluminum) base to the wooden-base (to make sure it's 'pretty square'), and you'll definitely need add'l "support" thru this portion of construction. I highly recommend having a "helper" availale (JMHO)...
|
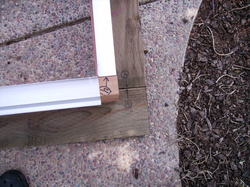
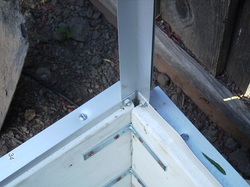 Case in point: The HF instructions said that the OUTSIDE dimensions of the base s/b 123" corner-to-corner (when measuring for "square"). Well, we did that, but had we left it that way, the aluminum back base piece would not have been resting on the wood base. I moved the entire "back" wooden baseboard back 1" and it still didn't match up properly. I plan to cut some 2"x2" redwood pieces and fit them into the back corners to fill in the gaps...
Even at that, there's still some pretty significant "overhang" with the aluminum base vs. the 2x12 wood-base. At least it's in the back, next to a fence, so it really doesn't matter for my purposes... Bottom Line: I suspect the overall dimensions need to be 2" longer (8'2") and a *hair* narrower (5'11-1/2") than the instuctions indicate (those are just "guesstimates!" YMMV). More pics coming soon!
|
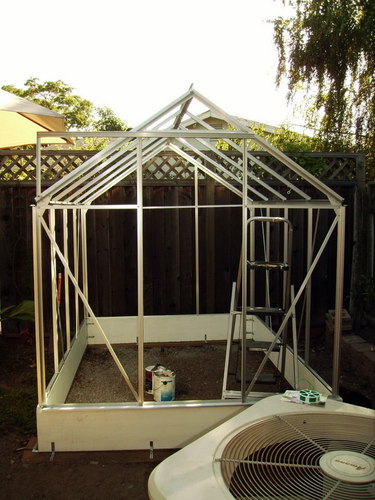
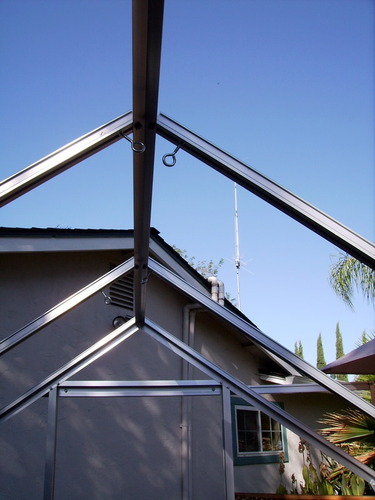 I meandered from the "supplied instructions" in a couple of ways: First off: We didn't assemble the roof ("crown pieces") as advised in the instructions. I added the 'risers' ['slanty-upward-corner-pieces!'] ( Or: 'crown beams' #2,3,4&5) to the base studs/corner supports (#13) FIRST, then added the 'peak' ['the flat-front-to-back-top-piece!] (Or: 'crown' piece #35) last. This actuallly turned out to be the easier approach. I did it, single-handed, by stretching garden-twist-tie wire along the length of the roof-line (front to back, loosely tying it thru the screw holes of the 'risers' [#2,3,4&5]) to 'temporarily' support the center 'crown' roof-beam while I completed assembly of the front & back 'ends'. One of the add'l "After-Market Modifications" I decided to add - while construction was underway - was half a dozen eyebolts (from Charley's Greenhouse). I think I'll be using these for either hanging plants, or lights, or whatever... Best to install them prior to completing assembly of the GH - since the 'nuts' fit inside the tracks of the roof-panel support beams (#11)...
|
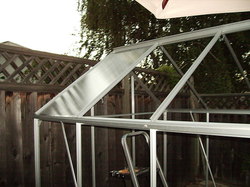 First polycarb panel installed!!!
* * * * * * * * * * * * * Other (hopefully) helpful hints: One Gardenweb Poster suggested putting aluminum tape on the tops/bottoms of each of the panels (to keep moisture out and create a true "dead air" space for increased insulation). And another suggested putting stick-on weatherstripping around each of the panels (on the inside-side). I opted for Marine/Auto grade weatherstripping (thinking it'll 'hold up' better in the elements - we'll see!). The stuff I'm using is 1/4" thick x 3/4" wide x 10' long from Home Depot - and I grossly underestimated how much I'll need (I'll post the final tally later)! Some folks put the weatherstripping on the GH frame, while others actually caulk the panels in place. I chose to put the weatherstripping on the panels themselves so they could be easily removed (i.e. if I opt to put "screen" panels in during the wamer months). I've put weatherstripping on all panels *except* for the windows (it worked out better to put the WS on the "frames" of the windows when I did it. Again, YMMV). It *should* help keep drafts out and it definitely helps the spring clips hold the panels in TIGHT!!! (Important note: The spring clips tend to, well... Spring! I sliced my hand open when one of 'em sprung - so BE CAREFUL!!!). Another GW hint: I've been installing self-tapping screws (I suggest #10 x 3/4" - if you use weatherstripping) at the tops and bottoms of each of the panels, once they're installed on the GH. This will prevent them from 'bowing out' and/or 'blowing away' if we get any heavy-duty windstorms... And yet one more Hint (that I didn't heed soon enough!): The panels have clear shrink-wrap plastic covering both sides. This must be removed before you install the panels. Well, I ended up leaving the panels out in the sun and, unfortunately, the plastic ended up 'gluing itself' to the panels making removal EXTREMELY difficult! I found that using a hair dryer did *kinda* help to remove the plastic (I wouldn't use a Heat Gun - might warp the polycarb panels). Also, using a plastic scraper (leftover from doing my fiberglass boat repairs) really did help with scraping the plastic off (and saved my fingernails!).
|
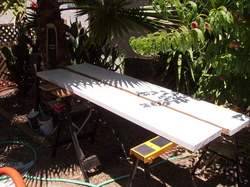
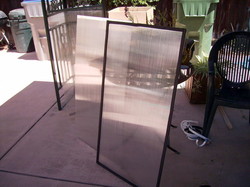 Updated 08/18/07
Here's a shot of "panel prep." This was a slow process ('cuz it was bloody hot outside and I was feeling Slow-Mo!). First I peeled off the protective film (sometimes with the aid of a hair dryer, since I left 'em outside in the sun too long). Panel on the left shows the aluminum tape on top and bottom. Panel on the right shows the weather-stripping (self-stick stuff on the INSIDE side of the panel). I lost count of how many packages of (10' length) weatherstripping I used. I'm guessing it was around 30 pkgs ($3.00@). Each panel probably took about 15-20 minutes - total - for prepping and installation (but, again, I was taking my time!)
|
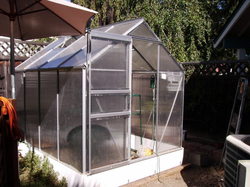 Here is the greenhouse - "mostly done!" I finished it up last weekend!
I think I'll add a separate page (running out of room on this one!) for some of the finer details and accessories and sh*t! (Link above "Greenhouse Saga Continues") Anyway, I'm *very* glad it's pretty-much complete. It only took 2-1/2 months!!! But that's definitely not "normal!" I totally took my time with building it - and did 90% of the assembly "solo." If you've got two "determined and handy" people working on it, this project could *easily* be completed in one day (probably just a few hours...)!
|
|
|
|
|
|
|


